
You put the food in the bag, place the open end into your vacuum sealer, close the lid, and wait.
The machine removes the air.
Then comes the seal.
You expect to see a clean, solid line across the bag. Instead, the seal is weak, uneven, wrinkled, or it opens a few minutes later. Sometimes the machine appears to work perfectly, but you still find air inside the bag the next day.
Frustrating? Absolutely.
The good news: a vacuum sealer that isn’t sealing properly doesn’t always mean there’s something seriously wrong with the machine. In many cases, the problem comes down to the bag, how the food is positioned, moisture, wrinkles, incorrect settings, or a small amount of overlooked maintenance.
Whether you’re vacuum sealing meat, fish, vegetables, cheese, leftovers, or prepared meals, getting a reliable seal is just as important as removing the air. A strong vacuum with a poor seal isn’t much use.
Below are the most common reasons a vacuum sealer isn’t sealing properly, and what to do about each one.
What Does a Good Vacuum Seal Actually Look Like?
Before troubleshooting, it helps to know what success looks like.
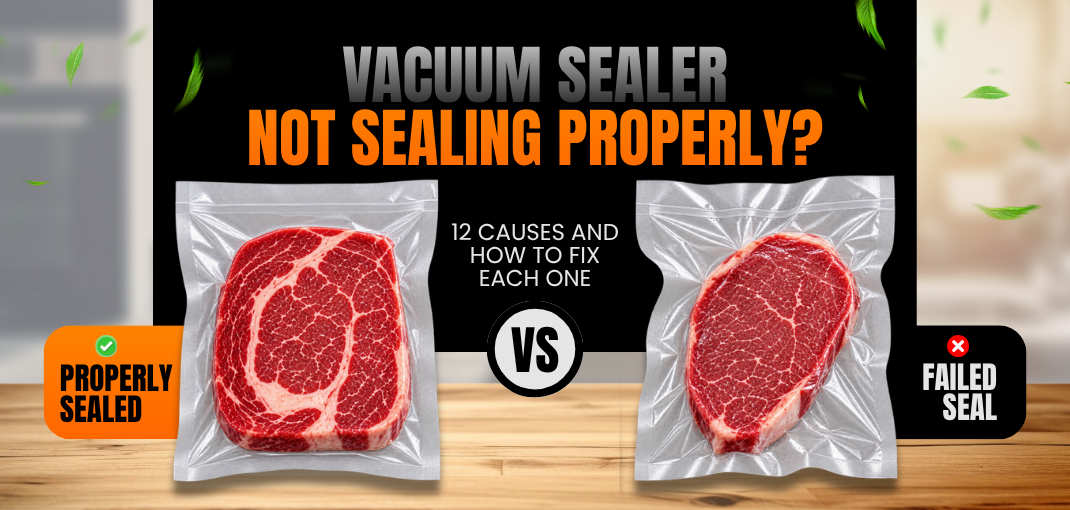
A properly sealed vacuum bag has a continuous, smooth seal across the entire opening no gaps, channels, folds, or areas where the plastic failed to bond. The bag should also stay closed after the cycle finishes.
If air starts returning to the bag immediately or shortly after sealing, the problem could be the seal itself, the bag, or a small puncture elsewhere in the packaging.
Remember: vacuuming and sealing are two different steps.
- The vacuum removes air from the bag.
- The seal closes the bag so air can’t get back in.
You need both working correctly.
1. The Bag Opening Isn’t Positioned Correctly
One of the simplest reasons for a poor seal is also one of the easiest to overlook: the open end of the bag needs to sit correctly inside the vacuum sealer.
If the opening isn’t in the proper sealing area, the machine may remove air but fail to create a consistent seal. You might end up with a partial seal, an uneven seal, a seal that doesn’t reach both edges, a weak section in the middle, or a bag that looks sealed but leaks later.
How to fix it: Before starting the cycle, straighten the open end of the bag. Make sure it’s flat and properly positioned in the sealing area. Avoid letting the bag bunch up, twist, or sit at an angle. If you’re sealing several bags at once, build a consistent positioning routine it makes troubleshooting much easier.
2. Wrinkles Are Preventing a Complete Seal
Wrinkles are one of the biggest enemies of a good vacuum seal. As the machine removes air, the bag gets pulled tightly around the food. If the opening already has folds or wrinkles, those folds can create tiny channels through the sealing area. The machine may appear to seal the bag while microscopic gaps remain.
This is especially common with irregularly shaped foods.
How to fix it: Pull the bag flat before sealing. Remove visible folds, and make sure both sides of the bag lie evenly across the sealing area. Reposition oddly shaped or sharp-edged foods before starting the cycle.
3. You’re Putting Too Much Food in the Bag
It’s tempting to fill a vacuum bag as much as possible. But overfilling makes a reliable seal much harder to achieve. If food reaches too close to the opening, it can interfere with the sealing area and small pieces of food, grease, moisture, or crumbs can get between the layers of the bag, producing a weak or contaminated seal.
How to fix it: Leave enough empty space at the top of the bag. The exact amount depends on your bag and machine, but the principle is simple: don’t pack food right up to the opening. This matters most when sealing ground meat, marinated products, cheese, or foods with small particles.
4. Moisture Is Getting Into the Sealing Area
When vacuum sealing fresh meat, fish, poultry, vegetables, or marinated foods, liquids can move toward the opening during the cycle. If liquid reaches the sealing area, it can prevent the bag material from bonding properly producing a seal that looks fine but isn’t actually airtight.
How to fix it:
- Pat the food’s surface dry with a clean paper towel
- Chill the food before sealing
- Allow excess marinade to drain first
- Position liquid-heavy foods carefully
- Leave extra space between the food and the sealing area
For very wet products, consider a different packaging approach or technique suited to liquids.
5. The Bag Is Dirty Where It Needs to Seal
Even a small amount of food residue can compromise a seal. Oil, fat, marinade, crumbs, sauce, or powder between the bag layers can create an imperfect bond. That’s why the same machine can produce a perfect seal on a clean bag and then struggle with a bag containing greasy or messy food.
How to fix it: Check the inside of the bag opening before sealing. If you see food or liquid near the sealing area, clean it away or reposition the food. Don’t assume the sealing heat will fix a dirty seal area on its own.
6. You’re Using the Wrong Type of Vacuum Bag
Not all plastic bags are designed for vacuum sealing. Vacuum bags use materials and construction built to work with vacuum sealing equipment ordinary food storage bags aren’t made for the same process, and using unsuitable packaging can cause poor vacuum performance and inconsistent seals.
How to fix it: Use vacuum-compatible bags suited to your machine. The machine and packaging work together as a system a good-quality vacuum sealer paired with the wrong bags can still produce disappointing results.
Looking for bags built for consistent seals? Explore Introvac’s vacuum sealing bags →
7. The Seal Time or Setting Isn’t Appropriate
Vacuum sealers use heat to bond packaging material together, which means the process needs the right amount of heat and time for the bag material being used. Too short a cycle, or settings mismatched to your bag, can produce inconsistent results.
A good seal should be continuous, even, secure, clearly bonded, and free from obvious gaps or channels.
How to fix it: Check your machine’s recommended settings and confirm your packaging is compatible with them. If troubleshooting, change one setting at a time so you can identify what actually fixed the problem.
8. The Sealing Area Needs Cleaning
Your vacuum sealer works around food, grease, moisture, and packaging material, so residue builds up around the sealing area over time. Even small buildup can affect how the bag sits during sealing.
How to fix it: Turn off the machine and follow your model’s cleaning instructions, paying close attention to any surface that contacts the bag. Remove residue regularly rather than letting it accumulate, and avoid cleaning products or methods not approved for your machine.
9. The Lid Isn’t Closing Properly
For chamber or lid-based machines, sealing depends on the unit closing correctly. If the lid isn’t closing properly, the machine may not complete the vacuum and seal cycle as intended. Common culprits: packaging material, food particles, debris, a misplaced bag, or a worn component.
How to fix it: Open the machine and inspect the sealing area. Confirm nothing is blocking the lid. If there’s a gasket or similar component, check it for damage, deformation, or wear, and consult your machine’s documentation if you spot an issue.
10. The Bag Is Being Punctured
Sometimes the seal itself is fine the problem is elsewhere. Sharp bones, shells, food edges, or other objects can create tiny holes during vacuuming or handling, which can look identical to a sealing failure once air returns to the bag.
How to fix it: After sealing, inspect the bag for small punctures, sharp corners, damaged edges, tiny holes near bones or shells, or abrasion marks. If the seal line looks strong but the bag still loses vacuum, check for a puncture before blaming the sealer. For sharp foods, reposition the product or use protective packaging techniques.
11. You’re Handling the Bag Too Soon
The sealing process bonds the packaging layers together. Pulling, stretching, or opening the bag immediately afterward isn’t a good habit the seal needs a moment to stabilize.
How to fix it: Let the cycle finish completely before removing the package, then inspect the seal. If it looks continuous and secure, handle it normally. This small workflow change reduces accidental damage to otherwise good seals.
12. Your Vacuum Sealer May Need Maintenance
If you’ve checked bags, positioning, moisture, food placement, and technique and you’re still seeing repeated problems, the machine itself may need attention. Watch for repeatedly weak seals, inconsistent vacuum performance, unusual operating behavior, damaged sealing components, a malfunctioning lid or gasket, or performance that’s clearly changed over time.
How to fix it: Don’t assume the machine has failed start with the simple checks first. If problems continue, consult your machine’s manual or contact the manufacturer for troubleshooting or service guidance.
Frequently Asked Questions
Why does my vacuum sealer bag lose its seal overnight? Usually a slow puncture (from a bone, shell, or sharp edge) or a seal that wasn’t fully continuous to begin with. Check the seal line for gaps first, then inspect the rest of the bag for small holes.
Why is my vacuum sealer seal wrinkled? Wrinkles in the bag opening before sealing create tiny channels air can pass through. Flatten the bag and remove folds from the sealing area before starting the cycle.
Can I use regular Ziploc bags in a vacuum sealer? No, standard storage bags aren’t built for vacuum sealing and can cause poor vacuum performance or unreliable seals. Use bags designed specifically for vacuum sealers.
Why does my vacuum sealer seal look fine but still let air back in? This is often moisture or residue in the sealing area preventing a full bond, or a puncture elsewhere in the bag rather than a failure at the seal line itself.
Quick Vacuum Sealing Troubleshooting Checklist
Before sealing
- Is the bag compatible with vacuum sealing?
- Is the bag opening clean?
- Is the sealing area free from moisture?
- Is the bag lying flat, with no wrinkles across the sealing area?
- Is there enough empty space at the top?
- Is food positioned away from the sealing area?
- Could anything sharp puncture the bag?
During sealing
- Is the bag positioned correctly?
- Is the machine completing the full vacuum cycle?
- Is the sealing cycle completing normally?
- Are you using the right settings for your packaging?
After sealing
- Is the seal continuous, with no wrinkles or channels?
- Does the seal remain closed?
- Is the bag holding its vacuum?
- Is there a puncture elsewhere in the bag?
This checklist helps you quickly tell whether you’re dealing with a packaging problem, a technique problem, or an equipment problem.
How to Get a Perfect Seal More Consistently
- Prepare the food – remove excess moisture and protect sharp edges where needed.
- Choose the right bag – use packaging designed for vacuum sealing and suited to your machine.
- Don’t overfill – leave enough clean packaging material around the opening.
- Keep the opening clean – one of the easiest ways to improve consistency.
- Flatten the bag – remove wrinkles from the sealing area before starting.
- Position the bag correctly – make sure the opening sits properly in the sealing area.
- Let the machine complete its cycle – don’t interrupt the process.
- Inspect every seal – a few seconds now saves a spoiled package later.
Don’t Ignore a Small Sealing Problem
It’s easy to look at a slightly uneven seal and think, “It’ll probably be fine.” Sometimes it is. Sometimes it isn’t. A small weak spot can eventually let air back into the package, reducing the benefits of vacuum packaging.
If you’re preparing a few packages for the freezer, checking the seal takes a minute. If you’re preparing dozens or hundreds, a consistent sealing procedure becomes even more important.
Good vacuum packaging isn’t just about removing air, it’s about creating a package that stays sealed.
When Should You Consider a Different Vacuum Sealer?
If you’ve corrected your packaging, technique, moisture, positioning, and maintenance but still get inconsistent results, it may be worth evaluating whether your current machine fits your needs.
A small household sealer and a commercial-grade vacuum sealer are built for very different workloads. If you’re regularly sealing large quantities of food, batch-prepping meals, packaging meat or seafood, running a small food business, or expecting frequent heavy use, machine capacity and construction matter.
Final Thoughts
When a vacuum sealer isn’t sealing properly, replacing the machine shouldn’t be your first move. Start with the basics: check the bag, check the opening, check for wrinkles, check for moisture, check how much food you’ve put in, check for punctures then inspect the machine and sealing area.
In many cases, a poor seal isn’t one major problem. It’s a small issue in preparation or technique that can be corrected in seconds. Once you identify the cause, consistent results get much easier.
The goal isn’t just to make the machine remove air it’s to create a clean, strong, reliable seal that keeps the package closed and protects the food inside.
Ready for Better Vacuum Sealing?
If you’re looking for a reliable vacuum sealer for home use, meal prep, food storage, or small business use, explore the Introvac vacuum sealing solutions and find the model that fits your needs.
A better sealing routine starts with the right equipment, the right packaging, and the right technique.