
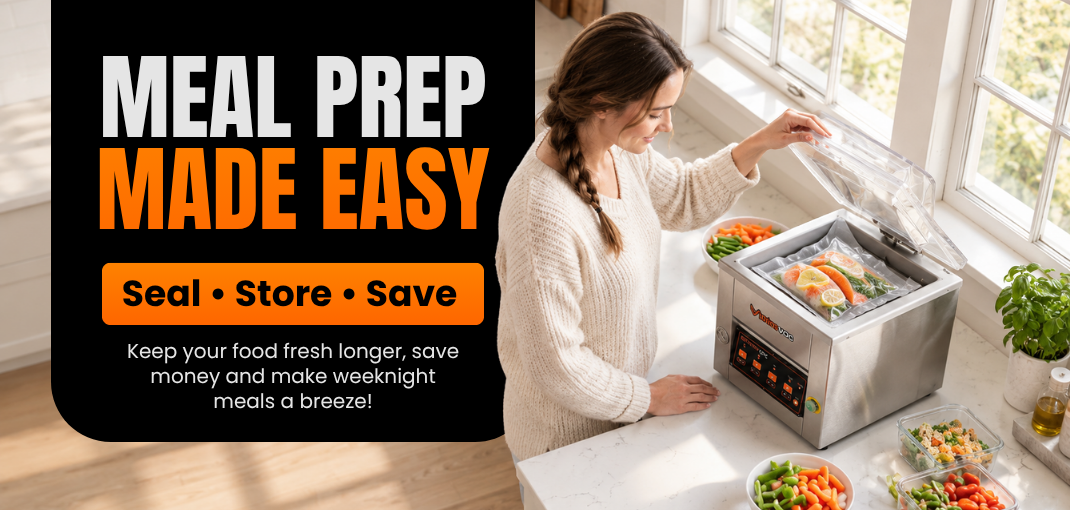
Make Weekly Meal Prep Easier with Vacuum Sealing
Planning meals for the entire week sounds simple until you bring home a large grocery order, open the refrigerator, and realize that everything needs to be sorted, portioned, and stored. Meat, chicken, fish, and leftovers can quickly take up valuable space, especially when they are kept in bulky containers or loosely packed bags.
This is where vacuum sealing can make a practical difference.
Instead of storing everything in its original packaging, you can divide food into meal-sized portions, place it in suitable vacuum sealer bags, remove the air, and seal each package. The result is a more organized approach to food storage that can make meal planning, freezer management, and everyday cooking more convenient.
A vacuum sealer is useful for more than storing freshly purchased meat. It can also help with planned leftovers, bulk grocery purchases, and ingredients prepared in advance for busy weekdays.
In this guide, we will explain how to prepare meat for vacuum sealing, choose appropriate portions, label packages, organize your freezer, and follow safe food-handling practices. Whether you are preparing meals for a family or looking for a more organized kitchen routine, these techniques can help you get more from your vacuum sealer.
1. Start with a Meal Plan Before You Seal
One of the most common mistakes in meal preparation is packing food without thinking about how it will be used later.
A large bag of chicken breasts might seem convenient when you are packing groceries, but it becomes less practical when you need only two pieces for dinner. Opening and resealing packages or thawing more food than necessary can make meal planning unnecessarily complicated.
Before vacuum sealing, consider the meals you expect to prepare over the next several days.
For example, you might divide your groceries into:
- Chicken portions for weekday dinners
- Beef portions for curries, burgers, or grilled meals
- Fish portions for quick lunches or dinners
- Cooked meat intended for a future recipe
- Individual portions for lunches or single servings
The ideal portion depends on your household size and eating habits. A family of four may prefer a package containing enough meat for one dinner, while someone living alone may find smaller portions more useful.
The practical rule is simple: package food according to how you intend to use it, not just according to how much you purchased.
This small step can make it easier to select the right package without disturbing the rest of your stored food.
2. Prepare Your Vacuum Sealer and Bags
Once your portions are planned, prepare a clean, dry workspace. Keep the vacuum sealer, compatible bags or rolls, scissors if needed, labels, and a marker within reach.
If you use vacuum sealer rolls, you can make bags according to the size of the food portions you intend to store. Pre-cut bags are another convenient option when you frequently package similar quantities.
When preparing a bag, leave enough space around the food for proper sealing. Overfilling can make it difficult to position the open end correctly or create a dependable seal.
Follow the instructions supplied with your particular vacuum sealer, as bag requirements and operating procedures can differ between machines.
Before starting the sealing cycle:
- Check the bag for damage, holes, or creases.
- Keep the area that will be sealed clean and dry.
- Position the open end correctly according to the machine’s instructions.
- Make sure food, grease, or liquid is not interfering with the sealing area.
- Confirm that the package is not overfilled.
These checks take only a short time but can help prevent failed seals and unnecessary food repackaging.
3. How to Vacuum Seal Raw Chicken, Beef, and Other Meat
Raw meat requires careful handling before and after vacuum sealing. Work with clean hands, clean utensils, and a clean preparation surface. Keep raw meat separate from ready-to-eat foods to reduce the risk of cross-contamination.
Prepare meat in manageable portions
Divide chicken, beef, pork, or other meat into the quantities you normally use for one meal.
For chicken breasts, you might package two or three pieces together. Ground beef can be divided into quantities suitable for burgers, meatballs, or a family meal. Larger cuts can be packaged individually if that better suits your cooking plans.
Arrange the food evenly
Place the meat inside the bag without forcing it into an awkward shape. When practical, arrange pieces in a relatively even layer rather than creating a thick, irregular bundle.
Flatter packages can be easier to stack and generally offer a more convenient shape for freezer organization. They may also make thawing more manageable, although the time required will still depend on the quantity and thickness of the food.
Avoid sharp bones or pointed edges pressing against the bag, as these can damage the packaging.
Position the bag and run the cycle
Follow the instructions for your Introvac vacuum sealer and the compatible bags you are using. Position the open end as directed, initiate the appropriate cycle, and allow the machine to complete the vacuum and sealing process.
Inspect the finished package before storing it. The seal should be continuous, with no visible gaps, folds, or trapped food particles across the sealing area.
If the package does not seal correctly, transfer the food to a fresh, suitable bag and repeat the process using the manufacturer’s recommended procedure.
Important: Vacuum sealing does not make raw meat safe to keep at room temperature. Refrigerate or freeze perishable food promptly and follow established food-safety guidance.
4. Vacuum Seal Cooked Meat and Leftovers
Vacuum sealing can also help you organize cooked food that you intend to use in future meals.
For example, leftover rotisserie chicken might later become an ingredient in enchiladas, sandwiches, wraps, soups, or pasta. Cooked beef can be divided into portions for future lunches, while prepared ingredients can make busy evenings easier to manage.
The main consideration is temperature.
Do not place hot food directly into a vacuum sealer or seal it while it is still warm. Divide large quantities into shallow containers where appropriate and cool them promptly using safe food-handling practices. Refrigerate cooked food within the recommended time limits rather than leaving it on the counter to cool for an extended period.
Once the food has been cooled safely, portion it into suitable bags and vacuum seal according to the equipment instructions.
Label each package with the food name and preparation date. If the food will not be used within the recommended refrigerated storage period, freeze it promptly.
Remember that vacuum sealing is a packaging method, not a substitute for safe cooling, refrigeration, or freezing.
5. Vacuum Seal Fish and Seafood with Extra Care
Fish and seafood can be convenient additions to a weekly meal plan, but they require careful storage because they are highly perishable.
If you purchase fresh fish, divide it into the portions you expect to cook. Remove excess surface moisture with clean paper towels when appropriate, and use bags compatible with your vacuum sealer.
For delicate fish fillets, handle the pieces carefully to avoid damaging their shape or the bag. For seafood with sharp shells or edges, make sure the packaging is suitable and protected against punctures.
If the fish is intended for freezing, package it and place it in the freezer promptly. Keep it cold during preparation and minimize the time it spends outside refrigeration.
What about fish that is already frozen?
If you purchase commercially frozen fish, follow the package directions and keep it frozen unless the product instructions specify otherwise. Do not assume that every frozen product should be thawed before repackaging.
For home vacuum sealing, follow the sealer manufacturer’s instructions and applicable food-safety guidance. In particular, vacuum-packed fish requires special care because reduced-oxygen packaging can create a risk of botulism under certain storage conditions.
Keep fish frozen as directed, and follow appropriate thawing instructions. Do not store vacuum-packed fish in the refrigerator after thawing unless the packaging has been opened or removed as required by the applicable food-safety guidance.
When in doubt, follow the original product’s instructions and consult an authoritative food-safety source.
6. Why Flat, Even Portions Make Storage Easier
Food packaging is not only about removing air. The shape of each package also affects how conveniently it can be stored and handled.
Consider two packages of chicken. One is packed into a thick, uneven bundle, while the other is spread into a relatively flat layer. Both may be vacuum sealed correctly, but the flatter package is usually easier to stack in a freezer drawer.
Evenly arranged portions can offer several practical benefits:
- Better organization: Similar package shapes are easier to arrange together.
- More convenient handling: Individual portions are easier to identify and remove.
- Simpler meal planning: Packages can be grouped by meal or ingredient.
- More predictable thawing: Thickness and portion size are easier to manage when packages are relatively uniform.
Do not flatten food so aggressively that it damages delicate ingredients or compromises the bag. The objective is to create a practical package that suits the food and your storage space.
7. Label Every Package Before It Goes into the Freezer
A freezer full of neatly sealed bags is not very useful if you cannot identify what is inside them.
Once packages are frozen, different cuts of meat and similar-looking portions can be difficult to distinguish. Labels help you avoid unnecessary searching and make it easier to use older packages first.
Include the following information where appropriate:
Food name: Chicken breast, ground beef, salmon fillet, or cooked chicken.
Packaging or freezing date: Record the date so you can track storage time.
Portion size: For example, two chicken breasts or 500 grams of ground beef.
Intended use: You might write “burger patties,” “soup,” or “Monday dinner.”
Storage or use instructions: Add any relevant guidance based on the food type and the date it was prepared.
Use a label or marker suitable for the packaging material, and make sure the information remains readable during storage.
A useful approach is to create a simple first-in, first-out system. Keep older packages toward the front of the freezer and place newly prepared packages behind them, where practical. This encourages you to use earlier purchases before newer ones.
Do not rely on the date alone to determine whether food is safe. Storage temperature, handling, the type of food, and how long it was refrigerated before freezing all matter.
8. Organize Your Freezer for Everyday Convenience
Once the food is sealed and labeled, arrange it in a way that makes sense for your household.
Clear bins or divided freezer drawers can help separate different food categories. For example, you could keep chicken in one section, beef in another, seafood in a separate section, and cooked meal portions in their own designated area.
If space is limited, flat packages can often be stacked or arranged upright in suitable bins. Make sure the packaging is not damaged by sharp edges or excessive pressure.
You can also keep a basic freezer inventory on your phone, a notepad, or a sheet attached to the freezer door. Record the food, quantity, and storage date whenever you add a new package.
A simple inventory might look like this:
| Food | Portions | Date stored | Planned use |
|---|---|---|---|
| Chicken breast | 4 | Oct. 10 | Weeknight dinners |
| Ground beef | 3 | Oct. 11 | Burgers and pasta |
| Salmon fillets | 2 | Oct. 12 | Weekend meals |
| Cooked chicken | 2 | Oct. 13 | Wraps and enchiladas |
This is only an example. Adjust the quantities and dates to match your actual food inventory.
An organized freezer makes it easier to see what you already have, which can help prevent unnecessary grocery purchases and forgotten food.
9. Can Vacuum Sealing Help Reduce Food Waste?
It can, particularly when vacuum sealing is combined with sensible portioning, labeling, and storage practices.
Food waste often happens because ingredients are forgotten, packages are too large for a single meal, or leftovers remain unused until their quality deteriorates.
Vacuum sealing can help address some of these practical problems by creating clearly identified portions and reducing exposure to air inside properly sealed packaging. For suitable foods, this can help preserve quality during storage.
It can also make bulk purchasing more manageable. If a larger package of meat offers better value, you can divide it into meal-sized portions and store the portions you will not use immediately.
However, savings are not automatic. They depend on purchase prices, how much food your household actually consumes, packaging costs, electricity use, and whether the stored food is eventually used.
The best results come from combining vacuum sealing with a realistic meal plan and a freezer inventory.
10. How to Choose a Vacuum Sealer for Your Meal-Prep Routine
The right vacuum sealer depends on how often you prepare food, what you intend to package, and how much storage space you have.
For many households, a countertop vacuum sealer is a practical starting point. It can support routine meal preparation without requiring a large dedicated packaging area.
Before choosing a machine, consider the following factors.
Frequency of use
If you seal a few packages every week, prioritize convenient operation, straightforward maintenance, and a design that fits your kitchen.
If you regularly process large quantities of meat or prepare food for a small business, consider whether your intended workload requires a different machine configuration.
Food types and bag compatibility
Different foods present different packaging challenges. Moist ingredients, delicate fish, irregular cuts of meat, and dry pantry items may require different handling techniques.
Check which bag types and sizes the machine supports, and follow its instructions for wet or moist foods. Not every external vacuum sealer is designed to handle liquids in the same way.
Available space
A countertop machine should be easy to access without permanently taking over your preparation area. Consider its footprint, where you will store bags, and how you will clean the work surface after use.
Ease of cleaning and maintenance
Food preparation equipment needs regular care. Look for clear instructions on cleaning, inspection, and replacement of serviceable parts where applicable.
Following the manufacturer’s maintenance recommendations can help keep the machine operating as intended.
Support and product guidance
Choose a supplier that provides useful operating instructions, information about compatible bags, and access to product support.
Introvac offers vacuum sealing solutions for customers looking to make food storage and preparation more convenient. Explore the available models at Introvac.com and review the specifications to find a machine suited to your routine.
11. Common Vacuum Sealing Mistakes to Avoid
Even a straightforward packaging routine can become frustrating when a few basic details are overlooked.
Overfilling the bag: Too little space near the opening can make proper sealing difficult. Leave the clearance recommended by the manufacturer.
Ignoring moisture around the seal: Food juices, grease, and particles can interfere with a reliable closure. Prepare the bag opening carefully and follow the machine’s instructions.
Using unsuitable packaging: Bags and rolls are not necessarily interchangeable across every machine. Confirm compatibility before purchasing supplies.
Packaging food in uneven, bulky portions: Large irregular packages can be harder to stack and manage. Divide food according to the meals you plan to prepare.
Forgetting labels: Unidentified packages make freezer management more difficult. Label each package before storing it.
Leaving perishable food out for too long: Vacuum sealing does not stop all microbial growth or make food safe at room temperature. Maintain appropriate refrigeration and freezing temperatures.
Assuming vacuum sealing makes food last indefinitely: Vacuum packaging can help preserve quality, but it does not eliminate all food-safety risks. Follow recommended storage periods and handling practices.
Thawing food on the counter: Thaw frozen meat in the refrigerator or use another recognized safe thawing method. Follow specific instructions for vacuum-packed foods, especially fish.
Frequently Asked Questions About Vacuum Sealing Meat for Meal Prep
1. Is vacuum sealing meat good for weekly meal prep?
Yes. Vacuum sealing can help divide meat into meal-sized portions, organize packages, and reduce exposure to air during storage. It is particularly useful when combined with appropriate refrigeration or freezing and clear labeling.
2. Should I vacuum seal meat before freezing it?
Vacuum sealing suitable meat before freezing can help protect its quality by reducing exposure to air. Handle the meat safely, package it using compatible materials, and freeze it promptly.
3. Can I vacuum seal cooked chicken?
Yes, provided the chicken is handled and cooled safely first. Do not vacuum seal hot food. Refrigerate or freeze cooked chicken within recommended time limits and follow the machine’s instructions.
4. How should I label vacuum-sealed food?
Write the food name and packaging or freezing date on each package. You can also record portion size and intended use. Use storage guidance appropriate to the food and its handling history.
5. Does vacuum sealing stop food from spoiling?
No. Vacuum sealing removes air from the package, but it does not eliminate all microorganisms or make perishable food shelf-stable. Appropriate refrigeration, freezing, hygiene, and safe handling remain essential.
6. Can vacuum-sealed packages save freezer space?
They can help. Properly sized bags often create flatter packages than bulky containers, making it easier to stack and organize food. Actual space savings depend on the food, packaging, and freezer layout.
7. Can I vacuum seal fish for freezing?
Suitable fish can be vacuum sealed for freezing, but vacuum-packed fish requires particular care because reduced-oxygen conditions can create a botulism risk under certain circumstances. Follow the equipment instructions and authoritative food-safety guidance for packaging, freezing, and thawing fish.
8. Should I use vacuum sealer rolls or pre-cut bags?
Both can work. Rolls let you make bags to suit different portions, while pre-cut bags can save preparation time when you regularly package similar quantities. Always choose supplies compatible with your vacuum sealer.
9. How do I know whether a vacuum-sealed bag has sealed correctly?
Inspect the finished package for a continuous seal without visible gaps, folds, or food particles crossing the sealing area. Follow your machine’s instructions for checking the package and correcting an unsuccessful seal.
10. Which Introvac vacuum sealer should I choose?
Start by considering how frequently you seal food, the ingredients you package, your available workspace, and the bag types you plan to use. Review Introvac’s current product specifications or contact the company for guidance on selecting a suitable model.
Conclusion: Build a Better Food-Storage Routine with Introvac
Weekly meal preparation does not need to involve complicated systems or hours of organizing. A few consistent habits planning portions, preparing bags correctly, inspecting seals, labeling packages, and keeping your freezer organized can make everyday food storage much easier.
Vacuum sealing can be a useful part of that routine, whether you are storing chicken for weekday dinners, dividing bulk purchases into smaller portions, or keeping suitable leftovers ready for future meals.
The key is to use the right equipment, package food appropriately, and maintain safe storage conditions.
Ready to make food storage more convenient? Explore the vacuum sealing solutions available from Introvac and find an option that fits your kitchen and meal-prep routine.
Visit Introvac.com to learn more.